While working on our project, we were instructed to follow a four-step process, from brainstorming to finalization of our ideas. The steps go as follows:
Step 1: alternative ideas
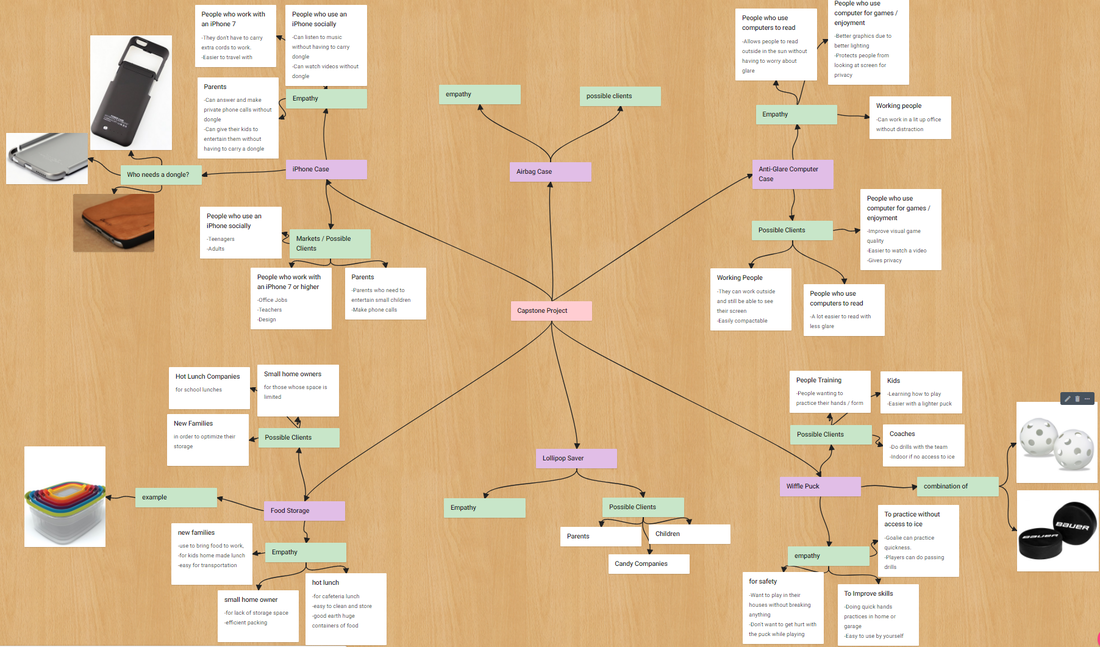
Our very first task was to come up with alternative ideas for our project. Here are some of the things we came up with:
step 2: Alternative ideas concept sketching
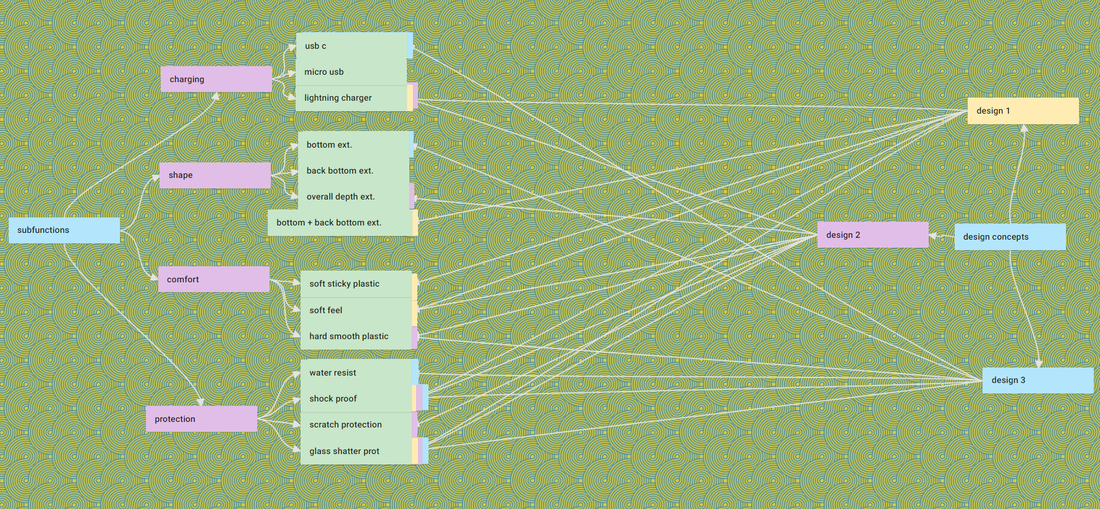
For an idea to be considered a feasible alternative concept, it must be represented in the form of a conceptual sketch.
The goal in producing a concept drawing is to convey what the design is and how it works in the clearest possible terms. Any lack of clarity, such as failure to represent one of the sub-functions, translates into doubts about the feasibility of the concept when it comes time to evaluate it.
At the same time, however, this is not a detailed design drawing. Dimensions and other details not relevant to understanding the basic nature of how the concept will work are left out.
It is best to proceed through two phases when generating a concept drawing.
First, in the creative phase, hand-sketching is done freestyle and quickly, without regard for neatness or visual clarity. A few simple lines, incomprehensible to others, might be enough to remind you of your idea. Sketching is a means for both storing ideas and brainstorming others.
Second, in the documentation phase, the concept is neatly redrawn and labeled to facilitate communication with team members and project sponsors/mentors.
The final outcome is one or more sketches (one rough and one more neatly re-drawn) prepared with the following guidelines in mind:
• Can be hand-sketched or computer generated.
• No dimensions (yet). Remember, these are not detailed drawing.
• Label parts and main features. If the drawing is hand-sketched, handwritten labeling is acceptable.
• Provide multiple views and close-up views if needed to describe how the design works.
Here are the pictures of our thought process and the sketches we drew up:
concept 1 Concept 2 COncept 3
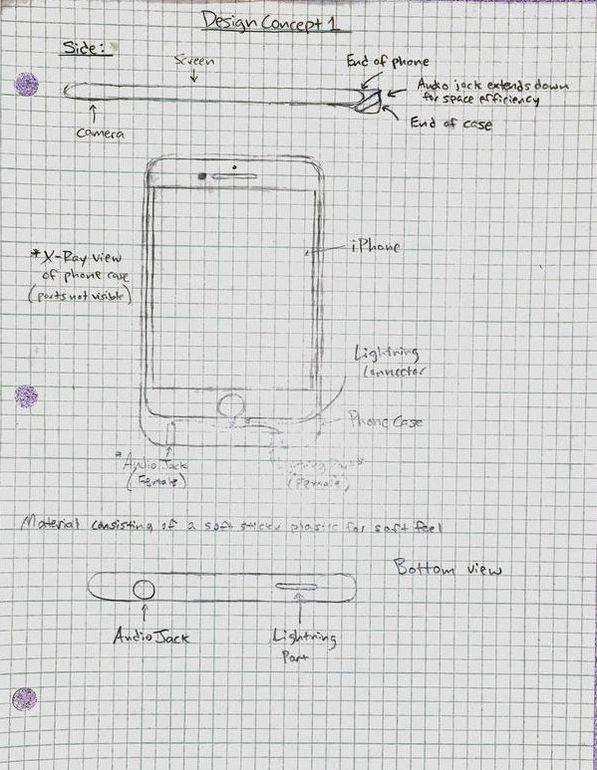
In this concept, we included a lower/back extension. The ports go into the case at an angle in order to maximize space efficiency.
|
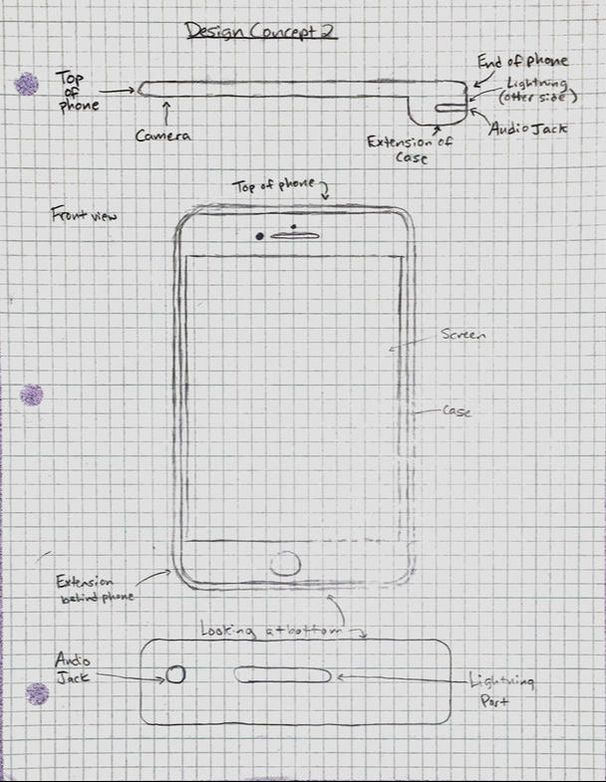
In this concept, we made it so that we don't need an extension on the bottom of the phone in order to minimize the y-axis dimensions.
|
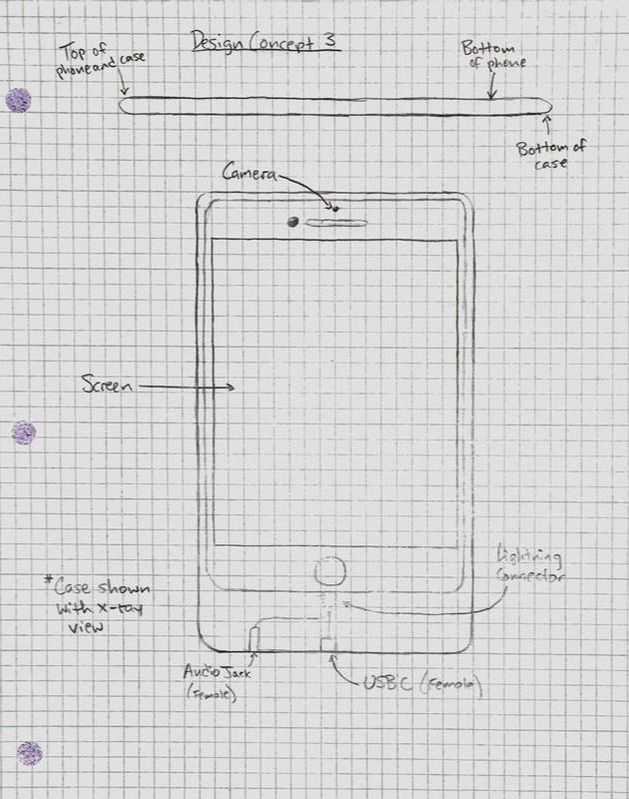
This design utilizes the bottom extension in order to keep the thin shape of the new iPhones.
|
Step 3: Evaluation of alternative concepts
Important concepts to apply to our designs:
-Minimize number of parts.
-Minimize number of different Kinds of parts.
-When possible buying parts (on the cheap!!!) is preferable to manufacturing them yourselves.
-Seek a modular design (i.e a design where the different functions are physically isolated.)
-Design for ease of manufacture.
-Design for robustness.
-Design for adjustability (thing can be tuned up on the fly to improve performance).
Things for us to Consider:
-There is no need to rig the results of the decision matrix to come out to the concept you want as the results are nonbinding.
-Do not blindly obey the results of your decision matrix; the selection of evaluation criteria may have been flawed to begin with.
-Engage everyone in the decision-making process.
-Do not shy away from bold designs just because they are different from everyone else's. Those differences could lead to some serious innovation.
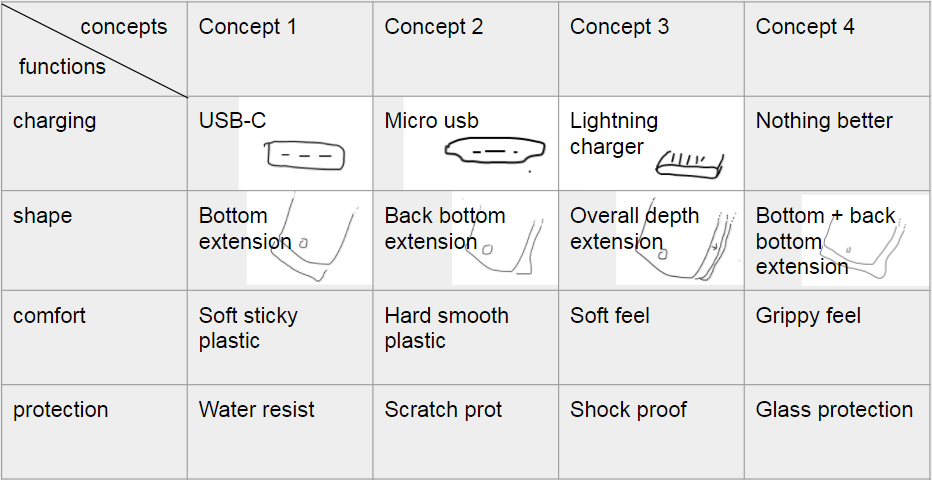
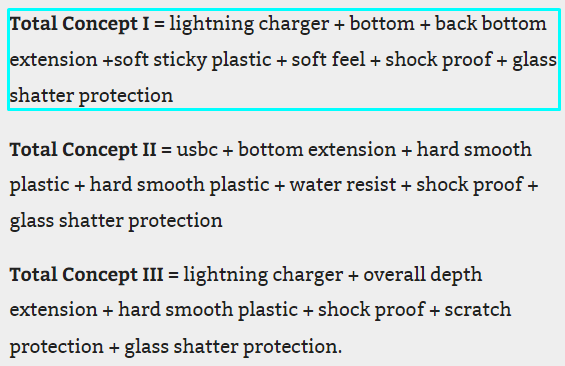
Here are our concepts laid out on a chart:
-Minimize number of parts.
-Minimize number of different Kinds of parts.
-When possible buying parts (on the cheap!!!) is preferable to manufacturing them yourselves.
-Seek a modular design (i.e a design where the different functions are physically isolated.)
-Design for ease of manufacture.
-Design for robustness.
-Design for adjustability (thing can be tuned up on the fly to improve performance).
Things for us to Consider:
-There is no need to rig the results of the decision matrix to come out to the concept you want as the results are nonbinding.
-Do not blindly obey the results of your decision matrix; the selection of evaluation criteria may have been flawed to begin with.
-Engage everyone in the decision-making process.
-Do not shy away from bold designs just because they are different from everyone else's. Those differences could lead to some serious innovation.
Here are our concepts laid out on a chart:
|
|
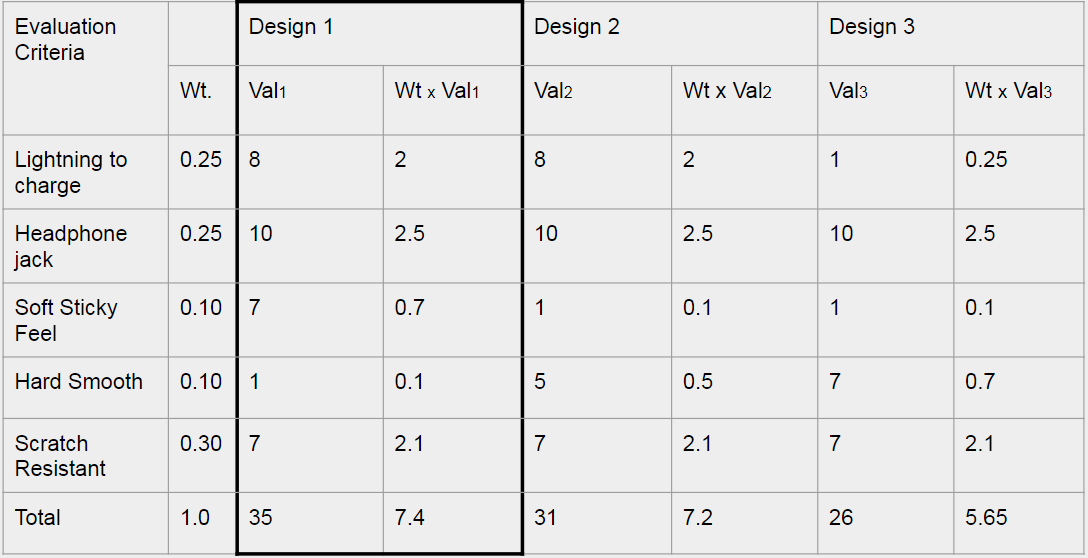
In order to finalize our idea, we needed to make a decision matrix:
Step 4: detailed design experiments and modeling
The goal of this step in the design process is to:
- Specify the details of the design so that it can be manufactured, by following instructions. Those details are the dimensions and material composition of parts, as well as the methods used to join them.
- Show the Analysis and Results of the experiments performed on your prototypes
- Identify aspects of your design and its performance about which you are uncertain.
- Associate the aspects in Design step 2 with one or more physical variables that can be varied by means of simple experiments.(YOU DON'T HAVE TO USE A BUILT PROTOTYPE OF YOUR PROJECT YET, YOU CAN TEST ASPECTS OF IT)
- Plan the experiment by sketching up the experimental setup (listing the materials needed)
- Carry out the experiments that will do the most to reduce risk of redesign within the available time frame.
- Document the results in the form of graphs or tables and following the Weebly Updates rubric.
